Sunday, June 30, 2013

Bring Back My Bar Tester Sets!!

"Just the smell of summer
can make me fall in love."
~Anonymous 


In my Scentsy business we have a semi-annual event that is very exciting to consultants and customers alike!  It's called Bring Back My Bar, (or BBMB) and it is where 20 of the most voted on retired scents come back for one month only!  This happens twice a year in which previous favorite scents come back for a one-month only appearance!  Long time customers and consultants alike will take the opportunity to purchase some beloved scents.  

In order to help my customers and spread the BBMB love around, I am making tester sets to go into pouch parties and for home parties.  Also taking the time to meet customers who don't have tine for a party but still want to smell and shop.  Believe it or not this is pretty simple to do!

If you have a team my suggestion is to plan a night where you can all get together, chat, have fun and make up tester sets together!  What a great team building time!

So let's get down to it ... what all do you actually need to do this?

  • Paint Pots - I purchased mine from my local craft store: they come in packages of 18 pots each.
  • Labels/Stickers - I have a deep love for my label maker and use it for almost all aspects of my business.  I have of course used mine here.  Some consultants will use circle labels and print via the computer or just write in the names.  Either way you choose you need some way to label what each scent is.  Get creative!!
  • Knife - To cut cubes down to size to fit into the pots.
  • Microwave - This is how we actually melt the wax in the pots to get a good tester.  *please see directions in this step below.
  • 1 cube of each BBMB scent - I am able to make 4 sets of 20 testers from 1 cube of each scent.  You can see the minimum and maximum number of tester sets you can make from a bar of each scent.  (minimum 4 sets / maximum 28 sets)

Starting with our paint pots.  I picked mine up at my local craft store.  I took a pair of scissors and cut the divider between each pot so no edges sticking out and so they are now individual testers rather in the long strip of 6 attached.

Next we take 1 cube of a BBMB scent.
Cut in half.

Cut each half in half.  Now you have 4 equal pieces of one cube.  Now we want to take a knife/cutter and cut each 1/4 cube into small pieces that will fit into one pot.

If you do this just right you will fit the 1/4 cube into one pot nicely.  

Now is the time sensitive part.  I mean this with all sincerity.  I don't normally warm any wax for any amount of time in the microwave, but for this project I just don't have any other way.  By timing this just right you can melt without loosing any part of the scent.  

Place the filled pots in the microwave and I do this in 10 second intervals.  10 seconds: check, if not yet melted - 10 more seconds.  And so on until each pot is melted.  For me this takes about 30 seconds (give or take) in my microwave.  Remember: not all microwaves are created equal.  Do not walk away from your testers when doing this step.  Keep a close eye and short intervals and you will be fine.

Here we are, fresh out of the microwave.  Melted perfectly.  You can also see that by just using 1/4 of a cube you have almost filled one pot.  

Normally when I do molds I will pop in the freezer.  These I wanted to cool and harden by just allowing to sit on the counter for about 10 minutes until set.  

Here you can see one batch that has completely hardened.  Perfect testers.

We are almost done!!

Next, take your choice of labels and place on each pot.  Again, you can use circle labels for the top either handwritten or printed - you can even use on the bottom of each container - make it a fun guessing game for the "Name This Scent" game!


I love my label maker so I simply printed out each scent name and affixed to the front of each tester.  

You can see you can do a lot with only 1 cube of each scent!!  Cost effective way to send out in pouch/tote/basket parties, take to events or home parties - even fundraisers!!  Remember, you don't have to just use this project for the BBMB time of year.  Missing a tester or need some for a fundraiser?  Make up a cheap set of testers all your own or in a pinch when you just can't seem to find a certain scent because your toddler ran off with it.  Oh, wait a minute ... that's just me.  ;)

Here is an example of one of my BBMB Pouch Parties.  It's a simple $.97 pencil pouch with a zipper.  Inside are some business cards, Host/Join brochures, catalog, product lists, order forms and monthly special fliers.  I will book hosts for my Pouch Parties so they are out and circulating.

Most importantly ... it's all about preference on how to do your own BBMB testers ... this is just mine.  I hope you have maybe found some inspiration!  Have fun and remember to share the love!!

Crafting Level: Intermediate
Time Spent: Approx 30 minutes

~Jacqui

Monday, May 27, 2013

Table Decor!

"Welcome!
May all who enter as guests
leave as friends."
~Anonymous


What a fun, fun way to re-use and still make things pretty!

I will admit: I have a healthy addiction to having my home smell nice.  It's my home.  Where I relax, where memories are made, where I spend the quality time with those I love.  So it's important to me that not only is my home inviting, but it smells amazing.

I love changing out my scents and having new smells to go with the mood or with the weather.  My only issue is the small feeling of guilt of just throwing away the empty containers afterwards.  There had to be something I could do with them, right?!

Why not make a cute table display??

This craft took me about 10 minutes total and I already had everything on hand.  Total cost: $3.00.  Not too shabby.

For this you will need some empty scent containers, hot glue gun, glue sticks, skewers, (or wooden Popsicle sticks), a small bucket or flower pot and some foam.

My husband had some thick foam from another project so I thought I would utilize that, although if you had some flower arrangement green Styrofoam that would work just fine. 

Start out by cutting your foam to size.  I used about two layers in my little bucket.  I picked up this cute little bucket up at my local Target for only $1, so of course I had to buy 1/2 dozen of them.  You just never know when you will need a small bucket.

Pile your foam in and then to secure it I took some hot glue and secured it nicely to the sides of my bucket.This way it will stay in place.

Next you are just going to use the grooves in the empty scent container and glue the top of your skewers, (not the sharp point) to the container.  This glue will dry fast so you can hold in place for about a minute and then you are good to go.

You can see on this one I went a little farther up the container, this way they will sit at varying heights in my pail to make for a nice arrangement look.

To personalize it a little more I cut a skewer down so it was much shorter than the rest so I could use a business card to add in.  You could use a sticker here, other advertizing material, anything at all.

Next you just stick in your skewers and arrange them like you would a flower bouquet.  I had some scrapbooking hearts on hand so I simply did a quick glue dollop and added three to my front sticks to add a little embellishment.

As a final touch I kept thinking of a sweet smelling flower bouquet and thought that some spritz of room spray would make this arrangement smell as sweet as it looks.  Now I can 'refresh' my scent any time I like!

And there you have it.  Easy, quick and a great use to use things you have on hand!  Why throw away when you can re-use??

Enjoy what you do and have FUN with it!!

Craft level: Novice
Time Spent: 10 minutes
Total cost: approx $3.00

~Jacqui

Saturday, December 15, 2012

Toddler Fun!

"It is not what you do for your children,
but what you have taught them to do for themselves,
that will make them successful human beings."
~Ann Landers

As a busy mom throughout the week you sometimes miss out on the fun things with your kids.  My weekends are reserved for catching up from the week.   I love having those lazy weekends around the house with my family.  Our little one will be turning 3 in about a week and she is a bundle of energy that sometimes is very hard to keep up with.  Keeping her engaged, learning and having fun can be a challenge.

I'm always on the lookout for fun and different things for her.  Today's project was no exception.  It was easy; took me about 10 minutes and she is already having fun.  Something so simple that brightened up her day.

Let's jump in .... 

Supplies are minimal and I had all of this in my craft supplies. 

  • Scissors
  • Sharpie
  • Popsicle sticks
  • Velcro
It's pretty easy to throw together.  You could do this with numbers or letters, but at home we are working on letters and words so we opted for letters.

You may want to plan a little in advance and think of words to fit your child's level.  My daughter is three so we are working on easy words, (e.g. STAR, PIG, MOM, DAD, RAT, BOP, etc.).  You just want to put the prefix on one side of the Popsicle stick and the suffix on the other.

You can see we now have a nice combination of words to create.  Now we need a way for them to be formed.  Bring on the Velcro!

The Velcro I keep in my crafting supplies is a large roll.  You can see there are two strips: one is the sticky side and the other is the soft side of the Velcro.  If you cut into strips you just have to match up on your ends.

Here's a close up look at the Velcro strips.  The soft side goes on the suffix side (on top) and the sticky side goes on the prefix side (underneath). 

When you do it this way you can see that now we can then stick them together to form words.  Easy peasy.

I'm not biased or anything ... but this was my favorite combination of letters. 

Once you've done this on all your Popsicle sticks you are complete!  For older children you can make this a match game.  One side has the animal name, the other has the sound it makes, (e.g. PIG on one stick; OINK on the other).  Do it with math by putting the math problem on one side and the answer on the other, (e.g. 1 + 1, on one side; 2, on the other).  The possibilities are endless. 

And just like that, it's play time.  She is already having fun by attaching the words and likes to shout out the letters.  Of course she has also discovered this is a fun way to make shapes, (we've experimented by making a square and a very large circle!). 

Have fun with your little ones.  Enjoy your moments. 

Crafter Level: Novice

~Jacqui


Sunday, December 2, 2012

Thank You VIP Gifts

"Be who you are and say what you feel,
Because those who mind don't matter
And those who matter don't mind."
~Dr. Suess

With my home business I want to make sure to not forget the customers who have been loyal to me.  I am a huge believer in treating others as you would like to be treated and with my business that is no exception.
With December being the last month of the year I am creating VIP Care Packages for my loyal customers.  It may sound simple, but it's my way of showing that I thank them for their continued business throughout the year.  Any business needs customers to succeed and my home business is no exception.

If you do any type of home business or even for your co-workers, bosses or leaders at your job, the teachers at your children's school, even the postman ... all of these individuals make a difference in our lives throughout the year.  Saying thank you in a unique way is a small token of what we can do to appreciate them all.

I found these adorable gift boxes at my most frequented store, Target, (I should seriously start asking about stock options...) so I had to pick up a bunch to have on hand.  These are the perfect size to give a gift to my V.I.P. customers.

As always - any gift, small or large sends the same message: thank you.  Depending on what you want to give these types of boxes may or may not work.  However I did see that they had other sizes in the gift section. 

Does this step really need explanation?  Doubtful.  To dress it up just a bit I threw in some tinsel.  Doesn't everyone love tinsel this time of year?!

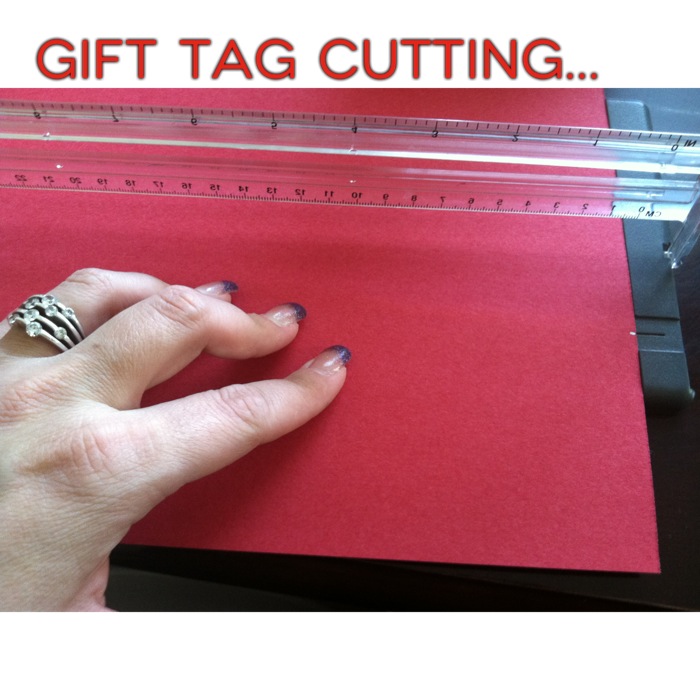
Now we just need a cute tag on the front.  You can buy pre-made tags at any hobby/craft store but I like to use what I have on hand when I can.  I took red construction paper and cut a tag shape with my paper cutter.

Dress up the tag with some fun stickers or embellishments. 

I used both letter stickers and a 'Thank You' stamp.  You can use a marker or ink pad on your stamp; I love the versatility of it.  I do this method often when making my own handmade cards and invitations.

Once you have your tag complete, stick to the front of the box.  Inside is a small card that I did a hand written message on to personalize my gifts for my individual customers.  

I'm not telling my VIP's about these.  I want it to be a surprise they are receiving them.  After all, the 'magic' of the holiday season is what really makes this time of year stand out.

Take the time to thank those people who contribute to you, your children or your friends.  A thank you goes a long way .... 

~Jacqui

Crafter Level: Novice

Good Neighbor Gifts

"A good deed
will make a good neighbor."
~Bantu Proverb

In the midst of all the busy hustle and bustle of the holiday season it can sometimes be easy to overlook the ones closest to you.  This year I am bound and determined not to do that.
I really wanted to do something sweet and simple for my neighbors and thought that I could give something fun and a little different than what they normally may receive.  To include a personalized touch I thought I'd take the concept of a card and gift and put it together into one.

So these are my good neighbor gifts that I'm delivering to doorsteps this week.  Just a little something to let them know we are thinking of them and wishing them and their families a very happy holiday.

Let's dig in .... 

Supplies are easy and you may have them on hand already.  First I picked a gift that was fun and unique and that was a circle freshener.  I started thinking ... what could I do with this to also do the card elements???  Circle = snowman.  Genius.

  • Construction Paper
  • Scissors
  • Hole Punch - I use my star punch, it's my favorite
  • Small diameter glass to trace a circle, (or a circle cutter if you have one
  • Tape Runner/Glue Stick/Glue dots
First I needed to trace the circle for the head of my snowman.  I used this glass to get the shape and then simply cut out.

Now you just take the different colored construction paper and start cutting shapes.  First off - every snowman worth his weight in snow needs a top hat.  Next, a small oblong triangle for the nose.

For his eyes and buttons I cut out stars using black construction paper.  Quick and easy with these punches.

Now we need to put it all together.  I love my tape runner but you can of course use a glue stick or glue dots for everything.

Last step is assembly of all your snowman parts.  I stuck everything directly to the package to create the snowman shape.  Depending on the gift you choose to give your placement will vary.

And here you see the final product.  My snowman all dressed up and ready to give out.  I attached a fun ribbon at the top and plan on tying a bow big enough so that I can simply place on the front door of my neighbors.  On the back is a short note that says:

"Thank you for being such a sweet neighbor.
We wish you the best this season.
A small gift of a sweet scent for your car for your sweetness all year round."

I hope they find this to be a fun surprise and cannot wait to see what they have to say.

The holidays are a fun time of year to thank those in your life.  Make sure you don't forget the people around you.

~Jacqui

Crafter Level: Novice


Saturday, November 10, 2012

Stocking Stuffers and Fun Holiday Gifts!

"I will honor Christmas in my heart,
and try to keep it all the year." 
~Charles Dickens

If you know me even a little, you know my favorite time of the year is upon us.  I'm already gearing up for my annual Black Friday fun, planning Thanksgiving with my two sister-in-laws and of course am already getting my gifts ready for my staff at work, friends and those select few who I just want to surprise.  This little project is one of those things that is so easy, simple and cute that you could use almost ANYTHING to do this with.  I have chosen some anti-bacterial foam bottles and thought it would be great to buy and then give out as gifts in my holiday gift giving. 

I love to give something a home made touch in my holiday gift giving because to me that adds just a little more meaning to the gift.  After all, it's the spirit of the giving that really matters anyway.  Let's jump right in here ...

This supply list is super simple and you probably already have it all. 
  • Your gift - pick any little gift you'd like, such as sanitizer foams like I did, hand soap, lotion, chap stick, etc. 
  • Ribbon - pick your color according to your gift.  If doing the Santa belts you can also use black electrical tape
  • Metallic Sharpie - pick your color
  • Scissors - Just for some quick snips
  • Tape Runner/Double Sided Tape - your choice
And that's it.  Now ... let's get creative here!!  We'll start with Santa - where else do start when you think of holiday gifts?!


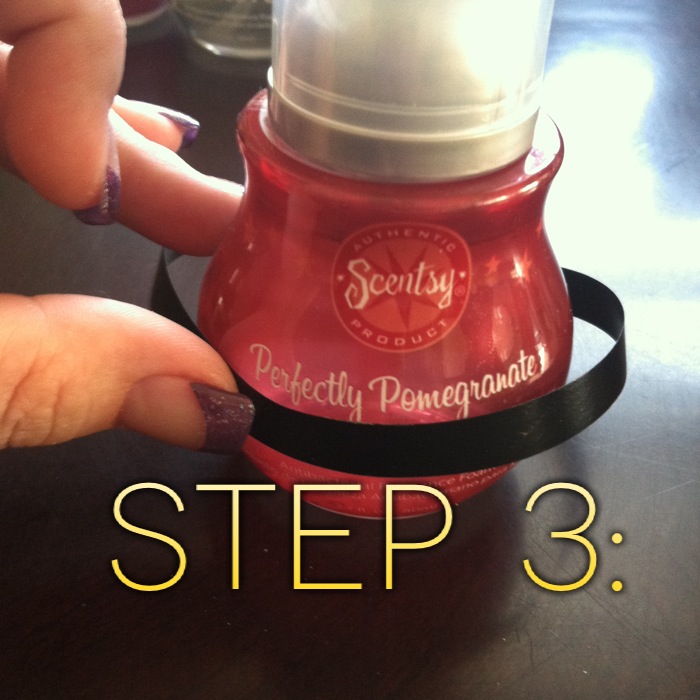
 Measure out your ribbon to fit the gift.  I overlapped mine a little.  Then cut to size.

I then took my tape runner and did little small 1/2" tape along the ribbon paying special attention to the ends.  This just helps it stay in place on your gift.

Line it up where you want it and then stick down.  Make sure your ribbon lines up so you have one nice black ribbon all the way around.

Now, take your metallic Sharpie and draw a buckle for Santa's belt.  I used silver as my preference color.

And there you have it!  A cute way to give your gift a fun holiday twist!  Simple, easy and so cute!!

Now ... we are going to try this same concept in some different ways ...

I do have some men in my life who need gifts and of course when giving to a man, you can make it 'cute' - it has to have some masculine traits to it.  So I thought I'd do a fun, different take on the ribbon concept.  Borrowing from a fictional character ... I call this my Grey Gift. 

Take your ribbon and measure out and use the tape runner just as you did above.  Only this time I'm not doing a belt - I'm doing a black tie.

Take a shorter piece of ribbon and then cut a v-shape at the end to simulate the tie look. Then just tape on to the top ribbon so that it hangs down.

See how quick this was?  Simple and yet totally gave this one a different look altogether than the Santa belt.  Perfect for any man on your holiday gift list.

Let's go for another try to mix it up a little more ...

Using silver ribbon this time I wanted to give this one more of a 'gift' look so it was more present-looking.  I took the ribbon and pulled out a nice stretch of it and then just cut a v-shape just like in the above example to just make our ribbon look a little dressed up. 

Adhere along the top of your gift and again, use the tape runner to help adhere it to the package.  Then, you are just going to tie a simple bow on the front. 

You could trim up the ends and be done here.  However since I'm using curling ribbon I wanted to take it up one more notch and I took the back end of my scissors and ran down the ends of the ribbon to make it curl up.

Here you see the ribbon is curled just like a present.  Another look to make it just a little different than the others.

And we are gonna go for one last look.  This one is clean, simple and perfect all year round.  Since my gift of choice this time is an antibacterial foam, I thought I'd do a play on words.  Everyone has heard of the catch phrase, "get milk" ... and so ...

Since this gift has more of a gold color I used my gold metallic Sharpie.  Then, I just wrote on the lid.

"get clean"  I know .. pretty clever.  You could write absolutely anything!  Their name, birthday, catch phrase ... anything at all, and again, this is one you could use all year round. 

Let's round all these little guys up ...

So here's our little mixed group of gifts.  Same concept on each, just with a different twist.  I'm sure you probably have a ton of other ideas to do with this as well.  I'm already thinking of some other cute gifts to give out using this same concept!  You can do this with anything!!  Have fun during the holiday season!

Crafter Level: Novice
 ~Jacqui