Saturday, December 15, 2012

Toddler Fun!

"It is not what you do for your children,
but what you have taught them to do for themselves,
that will make them successful human beings."
~Ann Landers

As a busy mom throughout the week you sometimes miss out on the fun things with your kids.  My weekends are reserved for catching up from the week.   I love having those lazy weekends around the house with my family.  Our little one will be turning 3 in about a week and she is a bundle of energy that sometimes is very hard to keep up with.  Keeping her engaged, learning and having fun can be a challenge.

I'm always on the lookout for fun and different things for her.  Today's project was no exception.  It was easy; took me about 10 minutes and she is already having fun.  Something so simple that brightened up her day.

Let's jump in .... 

Supplies are minimal and I had all of this in my craft supplies. 

  • Scissors
  • Sharpie
  • Popsicle sticks
  • Velcro
It's pretty easy to throw together.  You could do this with numbers or letters, but at home we are working on letters and words so we opted for letters.

You may want to plan a little in advance and think of words to fit your child's level.  My daughter is three so we are working on easy words, (e.g. STAR, PIG, MOM, DAD, RAT, BOP, etc.).  You just want to put the prefix on one side of the Popsicle stick and the suffix on the other.

You can see we now have a nice combination of words to create.  Now we need a way for them to be formed.  Bring on the Velcro!

The Velcro I keep in my crafting supplies is a large roll.  You can see there are two strips: one is the sticky side and the other is the soft side of the Velcro.  If you cut into strips you just have to match up on your ends.

Here's a close up look at the Velcro strips.  The soft side goes on the suffix side (on top) and the sticky side goes on the prefix side (underneath). 

When you do it this way you can see that now we can then stick them together to form words.  Easy peasy.

I'm not biased or anything ... but this was my favorite combination of letters. 

Once you've done this on all your Popsicle sticks you are complete!  For older children you can make this a match game.  One side has the animal name, the other has the sound it makes, (e.g. PIG on one stick; OINK on the other).  Do it with math by putting the math problem on one side and the answer on the other, (e.g. 1 + 1, on one side; 2, on the other).  The possibilities are endless. 

And just like that, it's play time.  She is already having fun by attaching the words and likes to shout out the letters.  Of course she has also discovered this is a fun way to make shapes, (we've experimented by making a square and a very large circle!). 

Have fun with your little ones.  Enjoy your moments. 

Crafter Level: Novice

~Jacqui


Sunday, December 2, 2012

Thank You VIP Gifts

"Be who you are and say what you feel,
Because those who mind don't matter
And those who matter don't mind."
~Dr. Suess

With my home business I want to make sure to not forget the customers who have been loyal to me.  I am a huge believer in treating others as you would like to be treated and with my business that is no exception.
With December being the last month of the year I am creating VIP Care Packages for my loyal customers.  It may sound simple, but it's my way of showing that I thank them for their continued business throughout the year.  Any business needs customers to succeed and my home business is no exception.

If you do any type of home business or even for your co-workers, bosses or leaders at your job, the teachers at your children's school, even the postman ... all of these individuals make a difference in our lives throughout the year.  Saying thank you in a unique way is a small token of what we can do to appreciate them all.

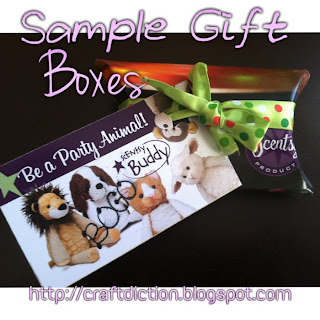
I found these adorable gift boxes at my most frequented store, Target, (I should seriously start asking about stock options...) so I had to pick up a bunch to have on hand.  These are the perfect size to give a gift to my V.I.P. customers.

As always - any gift, small or large sends the same message: thank you.  Depending on what you want to give these types of boxes may or may not work.  However I did see that they had other sizes in the gift section. 

Does this step really need explanation?  Doubtful.  To dress it up just a bit I threw in some tinsel.  Doesn't everyone love tinsel this time of year?!

Now we just need a cute tag on the front.  You can buy pre-made tags at any hobby/craft store but I like to use what I have on hand when I can.  I took red construction paper and cut a tag shape with my paper cutter.

Dress up the tag with some fun stickers or embellishments. 

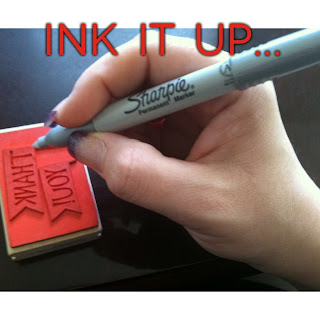
I used both letter stickers and a 'Thank You' stamp.  You can use a marker or ink pad on your stamp; I love the versatility of it.  I do this method often when making my own handmade cards and invitations.

Once you have your tag complete, stick to the front of the box.  Inside is a small card that I did a hand written message on to personalize my gifts for my individual customers.  

I'm not telling my VIP's about these.  I want it to be a surprise they are receiving them.  After all, the 'magic' of the holiday season is what really makes this time of year stand out.

Take the time to thank those people who contribute to you, your children or your friends.  A thank you goes a long way .... 

~Jacqui

Crafter Level: Novice

Good Neighbor Gifts

"A good deed
will make a good neighbor."
~Bantu Proverb

In the midst of all the busy hustle and bustle of the holiday season it can sometimes be easy to overlook the ones closest to you.  This year I am bound and determined not to do that.
I really wanted to do something sweet and simple for my neighbors and thought that I could give something fun and a little different than what they normally may receive.  To include a personalized touch I thought I'd take the concept of a card and gift and put it together into one.

So these are my good neighbor gifts that I'm delivering to doorsteps this week.  Just a little something to let them know we are thinking of them and wishing them and their families a very happy holiday.

Let's dig in .... 

Supplies are easy and you may have them on hand already.  First I picked a gift that was fun and unique and that was a circle freshener.  I started thinking ... what could I do with this to also do the card elements???  Circle = snowman.  Genius.

  • Construction Paper
  • Scissors
  • Hole Punch - I use my star punch, it's my favorite
  • Small diameter glass to trace a circle, (or a circle cutter if you have one
  • Tape Runner/Glue Stick/Glue dots
First I needed to trace the circle for the head of my snowman.  I used this glass to get the shape and then simply cut out.

Now you just take the different colored construction paper and start cutting shapes.  First off - every snowman worth his weight in snow needs a top hat.  Next, a small oblong triangle for the nose.

For his eyes and buttons I cut out stars using black construction paper.  Quick and easy with these punches.

Now we need to put it all together.  I love my tape runner but you can of course use a glue stick or glue dots for everything.

Last step is assembly of all your snowman parts.  I stuck everything directly to the package to create the snowman shape.  Depending on the gift you choose to give your placement will vary.

And here you see the final product.  My snowman all dressed up and ready to give out.  I attached a fun ribbon at the top and plan on tying a bow big enough so that I can simply place on the front door of my neighbors.  On the back is a short note that says:

"Thank you for being such a sweet neighbor.
We wish you the best this season.
A small gift of a sweet scent for your car for your sweetness all year round."

I hope they find this to be a fun surprise and cannot wait to see what they have to say.

The holidays are a fun time of year to thank those in your life.  Make sure you don't forget the people around you.

~Jacqui

Crafter Level: Novice


Saturday, November 10, 2012

Stocking Stuffers and Fun Holiday Gifts!

"I will honor Christmas in my heart,
and try to keep it all the year." 
~Charles Dickens

If you know me even a little, you know my favorite time of the year is upon us.  I'm already gearing up for my annual Black Friday fun, planning Thanksgiving with my two sister-in-laws and of course am already getting my gifts ready for my staff at work, friends and those select few who I just want to surprise.  This little project is one of those things that is so easy, simple and cute that you could use almost ANYTHING to do this with.  I have chosen some anti-bacterial foam bottles and thought it would be great to buy and then give out as gifts in my holiday gift giving. 

I love to give something a home made touch in my holiday gift giving because to me that adds just a little more meaning to the gift.  After all, it's the spirit of the giving that really matters anyway.  Let's jump right in here ...

This supply list is super simple and you probably already have it all. 
  • Your gift - pick any little gift you'd like, such as sanitizer foams like I did, hand soap, lotion, chap stick, etc. 
  • Ribbon - pick your color according to your gift.  If doing the Santa belts you can also use black electrical tape
  • Metallic Sharpie - pick your color
  • Scissors - Just for some quick snips
  • Tape Runner/Double Sided Tape - your choice
And that's it.  Now ... let's get creative here!!  We'll start with Santa - where else do start when you think of holiday gifts?!


 Measure out your ribbon to fit the gift.  I overlapped mine a little.  Then cut to size.

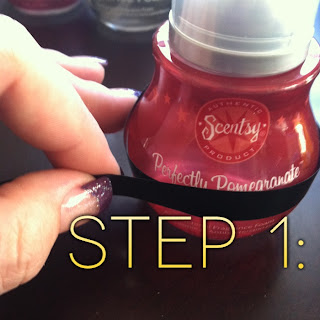
I then took my tape runner and did little small 1/2" tape along the ribbon paying special attention to the ends.  This just helps it stay in place on your gift.

Line it up where you want it and then stick down.  Make sure your ribbon lines up so you have one nice black ribbon all the way around.

Now, take your metallic Sharpie and draw a buckle for Santa's belt.  I used silver as my preference color.

And there you have it!  A cute way to give your gift a fun holiday twist!  Simple, easy and so cute!!

Now ... we are going to try this same concept in some different ways ...

I do have some men in my life who need gifts and of course when giving to a man, you can make it 'cute' - it has to have some masculine traits to it.  So I thought I'd do a fun, different take on the ribbon concept.  Borrowing from a fictional character ... I call this my Grey Gift. 

Take your ribbon and measure out and use the tape runner just as you did above.  Only this time I'm not doing a belt - I'm doing a black tie.

Take a shorter piece of ribbon and then cut a v-shape at the end to simulate the tie look. Then just tape on to the top ribbon so that it hangs down.

See how quick this was?  Simple and yet totally gave this one a different look altogether than the Santa belt.  Perfect for any man on your holiday gift list.

Let's go for another try to mix it up a little more ...

Using silver ribbon this time I wanted to give this one more of a 'gift' look so it was more present-looking.  I took the ribbon and pulled out a nice stretch of it and then just cut a v-shape just like in the above example to just make our ribbon look a little dressed up. 

Adhere along the top of your gift and again, use the tape runner to help adhere it to the package.  Then, you are just going to tie a simple bow on the front. 

You could trim up the ends and be done here.  However since I'm using curling ribbon I wanted to take it up one more notch and I took the back end of my scissors and ran down the ends of the ribbon to make it curl up.

Here you see the ribbon is curled just like a present.  Another look to make it just a little different than the others.

And we are gonna go for one last look.  This one is clean, simple and perfect all year round.  Since my gift of choice this time is an antibacterial foam, I thought I'd do a play on words.  Everyone has heard of the catch phrase, "get milk" ... and so ...

Since this gift has more of a gold color I used my gold metallic Sharpie.  Then, I just wrote on the lid.

"get clean"  I know .. pretty clever.  You could write absolutely anything!  Their name, birthday, catch phrase ... anything at all, and again, this is one you could use all year round. 

Let's round all these little guys up ...

So here's our little mixed group of gifts.  Same concept on each, just with a different twist.  I'm sure you probably have a ton of other ideas to do with this as well.  I'm already thinking of some other cute gifts to give out using this same concept!  You can do this with anything!!  Have fun during the holiday season!

Crafter Level: Novice
 ~Jacqui


Sunday, November 4, 2012

Chic Gift Giving

"The manner of giving
is worth more than the gift."
~Pierre Cornielle

November is the month to be thankful.  One of the things I am thankful for is the people in my life whom I can give gifts to.  I don't want to just give any gift, I want to give something that means something.  Something that shows that person that I took time to do something special just for them.  This is one of those little crafts.
This is a craft that again can be done all with materials you probably already have.  And another great project in which we are up-cycling rather than throwing away.  I like those kind of crafts.
 
This is something I made up for my home business, however it is something that can be used for any occasion.  A fun way to wrap money rather than in a regular card.  A small pair of earrings or candy to give out as a thank you.  Absolutely anything you can think of that would fit in this little homemade box would be perfect.

So let's get to it, shall we?  What do we need for these chic little gift boxes?
  • Toilet Paper rolls - I told you we were up-cycling here.  Why just throw these little guys away when you can make a cute gift box?
  • Ribbon
  • Cardstock/Flier - I did this sample for my home business but works just perfect with thick or thin cardstock in any color or pattern
  • Paper Cutter - Not mandatory, but this paper cutter is a staple in my craft supplies.  A quick way to cut paper up to 12" x 12"
  • Tape Runner/Glue Stick - Simply preference here, doesn't matter which you use
  • Gift - My gift in this example is a wax sample, but as mentioned above could be anything you want to give
  • Hole Punch - I use my handy dandy star punch for a lot of my crafts and this was no exception
So jumping right in ....
If you use a pen you can quickly mark off the width of your paper so you know where to cut so it is the same width as the toilet paper roll.  Then I placed in my paper cutter and cut to fit.

I lined up what part of the picture on my flier I wanted to show on my gift box, but if using plan card stock, no need to worry about that; cut to fit the roll.  Above you can see I just wrapped the flier around it quickly to get an idea of where to trim off.

Now we need to adhere the paper to the roll.  I used my tape runner and ran some tape along the bottom and about every 1/2" up just so when I stuck it on the roll I would get a nice, secure stick.

Roll up with your tape/glue and press down so that you have a nice secure fit.

Now to make the sides.  Take one end and bend in so you make a crescent shape on one side as you see above.  Then, repeat on the opposite side to close your gift box.

Here is what it looks like with the side bent in to close the box.  The toilet paper roll holds in place nicely so no need to tape or secure.

Now for the entire reason you are making this: the gift!  My example shows a wax sample that I'm giving - but remember anything you can fit inside would be perfect!  Cash, candy, small jewelery - the possibilities are endless!

Once your gift is inside you simply repeat on the other side of your roll and close up the end by using the crescent bend.  Again - the toilet paper roll is perfect for these little gift boxes because the cardboard holds perfectly with no need to seal it shut.  As you can see also, I lined up my paper so that I had the picture I wanted on the front of my gift box.

Add a tag to your gift.  "Thank you!" My example I am using one of my business cards but you can put absolutely any tag on this.  A short note, thank you or advertising.

To put the finishing touch on, I added a ribbon around it and threaded through my card, (or gift tag) to attach.  Tie a simple bow.

The front view you can see ties up the gift perfectly. 

The back view is clean and sharp.

And there you have it!  A chic little gift box that took about 10 minutes to make.  

I plan on using these a lot in my home business and also for my nieces/nephews whenever I am wrapping up their smaller Christmas presents.  For that I will be using just regular holiday wrapping paper.  Again - all materials I'll have on hand and won't cost me a single dime.  (might I note a perfect use for the toilet paper rolls in my home!)

Enjoy and have fun!  This is the gift giving season - so make it count!

Crafter Level: Novice

~Jacqui